Behind Paged.js
With the first preview of Paged.js coming very soon (!) I thought I would post an example book I made last week with Paged.js, and provide some tips on how I made it.
First the book — you can have a look at this PDF and follow what happens below: Pubsweet - how to build a publishing platform. The post also contains some codepen examples to see paged.js running live. You can change the zoom level by clicking the 0.5 or 0.25 buttons in the bottom right of those boxes.
Update: there were some issues with Safari, that are now fixed. While it works fine for screen rendering, I would recommend you check the demos using Chromium and print the webpage.
And here we go.
Page Size
First, Paged.js looks at your CSS file(s) to search for specific properties included in the media-queries rule @media print. The first one it will look for is the @page selector that lets you define the properties when it comes to print.
@page {
    size: 17cm 24cm;
    margin: 30mm 25mm;
}
So my book will be 17 × 24 cm and will have top and bottom margins of 30mm, left and right of 25 mm. A simple book, with big margins. With those two lines, I define the size of my book and the margins for all the pages.
See the Pen PagedMedia —rendering the @page by julientaq on CodePen.dark
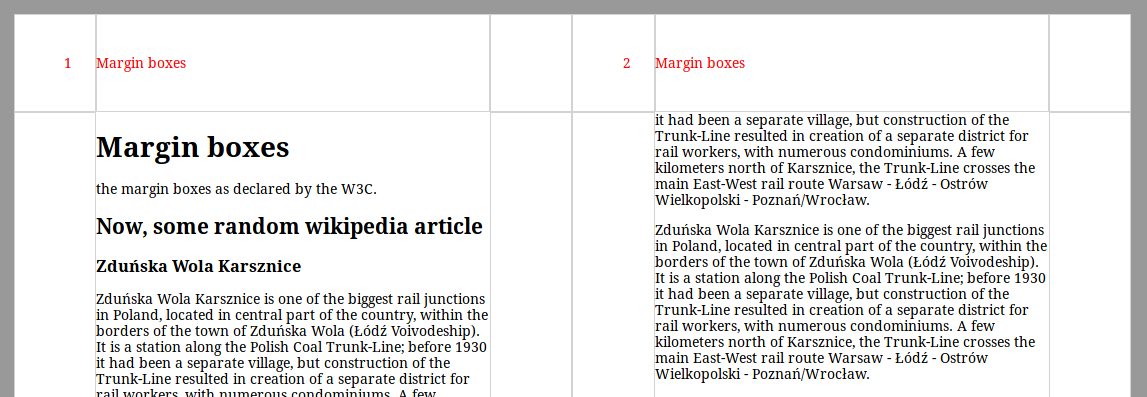
Using Margin Boxes
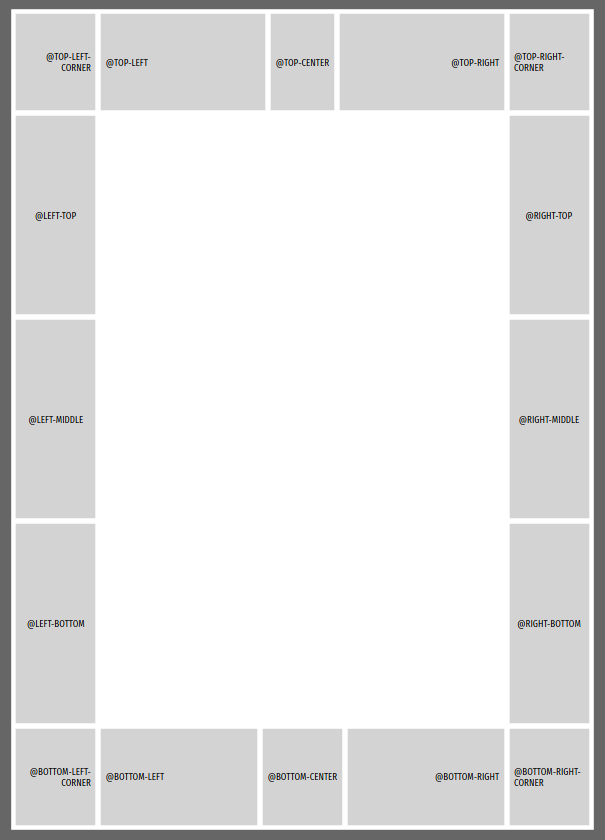
Before we continue, you need to know that W3C specifications divide your margins into 17 areas called margin boxes, as shown below.
See the Pen PagedMedia — @page Margin-boxes model by julientaq on CodePen.dark
Each box can receive some content generated by the CSS file such as running headers, page number, etc. To do so, we add to our @page the name of the box-model and the properties of its content.
@page {
    size: 17cm24cm;
    margin: 30mm 25mm;
    @top-left {
        content: "put here the content you want";
        color: red;
    }
}
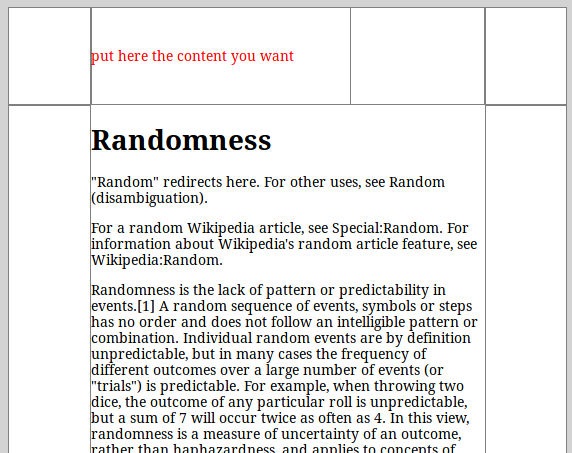
See the Pen PagedMedia — simple margin-box example by julientaq on CodePen.dark
We’re now able to specify the location of the elements we’ll need on our page, such as running headers and page number.
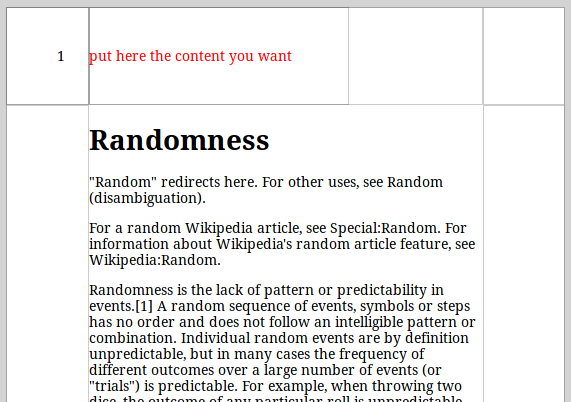
For the page numbers, the W3C proposes a specific counter named page . To add the page number you need to set the content property like this: content: counter(page)
This is what it looks like when you want to add the page number in the top left corner of your page:
@page {
    size: 17cm24cm;
    margin: 30mm 25mm;
    @top-left {
        content: "put here the content you want";
    }
    @top-left-corner {
        content: counter(page);
    }
}
Running headers
Now that the page numbers are set, let’s transform that “Put the content where you want” into something useful - running headers.
Unlike page numbers, the running headers need a little bit of preparation in your HTML as we’re using CSS properties that will remove the element from the flow and position it in the margin-box.
This is what your HTML could look like for a chapter about margin boxes:
<h1 class="chapter-title">Margin boxes</h1>
<div class="running-title">Margin boxes</div>
Your <h1> is your actual chapter title, as it will appear in the content of the book. The <div class="running-title">Margin boxes</div> specifies what is going to end up in the margin box. It’s a two step process: first, set the display properties of the .running-title element as a running one.
.running-title {
   position: running(runningTitle);
}
position: running creates a sort of variable that is here called runningTitle and its value will change every time there is a new .running-title element. That’s why you want to keep the actual title (h1) next to its running counterpart.
To reuse that variable in the margin-box, you would set it like this (to appear in the top-left box):
@page {
    size: 17cm 24cm;
    margin: 30mm 25mm;
    @top-left {
        content: element(runningTitle);
        color: red;
    }
    @top-left-corner {
        content: counter(page);
        color: red;
    }
}
And here is the result on a screen:
See the Pen PagedMedia — @page number anb running headers by julientaq on CodePen.dark
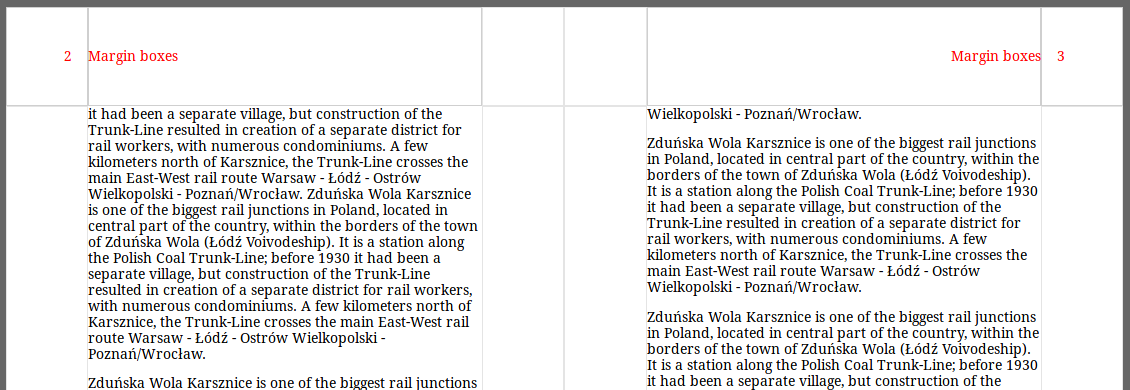
Symmetrical pages
One of the interesting features of Paged.js is the ability to declare different layout for different pages: left pages, right pages, but also blank, recto or verso. Each of those can be defined in the CSS with different margins, and with different content for each of the margin-boxes. For example, we could reuse the bit of code we made before and define a symmetrical layout.
To do so, we will use the @page property with different specified attributes:
@page :firstwill define the layout for the first page of your book@page :rightwill define the layout for all the right pages of your book@page : leftwill define the layout for all the left pages of your book@page :blankwill define the layout for all the empty pages of your book@page :rectowill define the layout for the recto when creating a book with recto/verso pages@page :versowill define the layout for the verso when creating a book with recto/verso pages
Let’s try to set the page number and the running titles on a spread: for the right page, we want the page-counter in the top-right-corner, and the running header in the top-right area. We can do this as follows:
@page :right {
    @top-right-corner {
        content: counter(page);
    }
    @top-right {
        content: element(runningTitle);
    }
}
Obviously, we’d do the same for the left page, but would position the generated content symmetrically (if you agree with Jan Tschichold)
@page :left {
    @top-left-corner {
        content: counter(page);
    }
    @top-left {
        content: element(runningTitle);
    }
}
Here is the result:
See the Pen PagedMedia — @page symmetrical layout by julientaq on CodePen.dark
Named pages
There could be pages in any book that may need a special layout, or a different background colour from the rest of the book, or even different margins, fonts, etc.
No worries, you’re covered, using what is called “named pages”. Based on your HTML, you can bind a specific layout to any content. So let’s imagine that our book is made of part and chapters. Chapters will use the layout we defined for the left and right pages earlier, but the pages that separate each part must have a different layout. We’ll define this later, but first, let’s have a look at our HTML.
<section class="part">
    <h1>Awesome part</h1>
    <p>In this part, we'll talk about a lot of different things</p>
</section>
So we have a section with a class part that contains a title and a paragraph. So first, let’s define, in our CSS, what layout will be used for a .part section, using the page property:
section.part {
    page: part;
}
page: part means that the @page part layout will be used. Let’s define our part layout: we will add a background color, and remove the running headers and the page numbers.
@page part {
    background-color: lightcyan;
    @top-right-corner {
         content: none;
    }
    @top-right {
        content: none;
    }
    @top-left-corner {
         content: none;
    }
    @top-left {
        content: none;
    }
}
section with a class partwill use the @page part layout .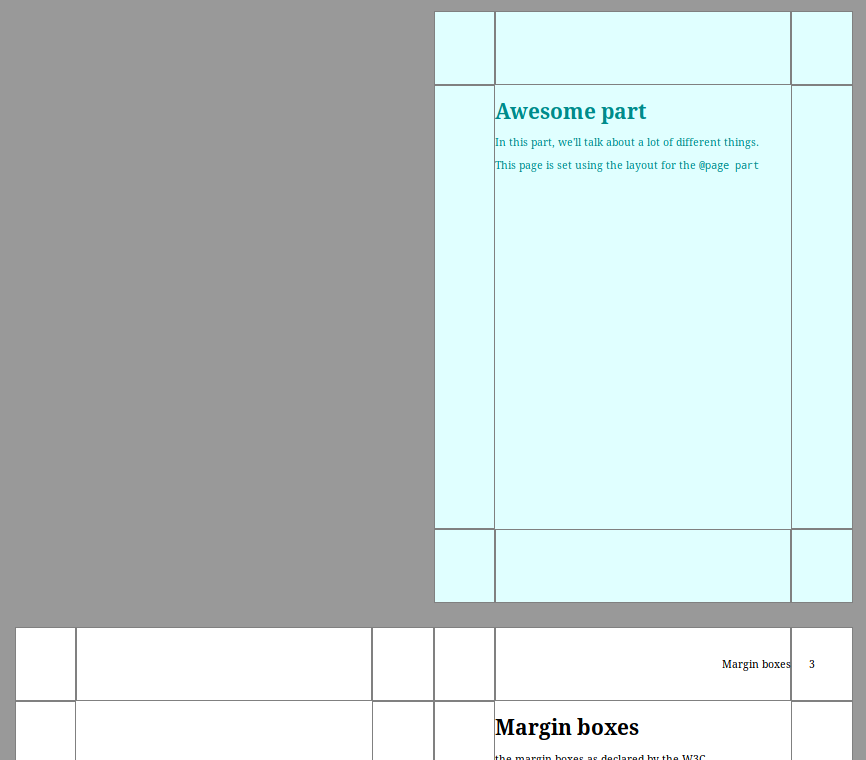
See the Pen PagedMedia — @page namedPages layout by julientaq on CodePen.0
:first attribute. For example, you want to set the margin of the first page of all your chapters, you’d do something like this:@page chapter :first {
margin: 120mm 25mm 30mm;
}
And you’re also able to select all the right pages of your named page chapter
@page chapter :right {
    margin: 30mm 25mm 30mm;
}
Also, on a side note, while your browser is able to use page-break-before and page-break-after to send content to the next page, paged.js is looking for break-before, break-inside and break-after, and those properties can go with those options:
break-before: pagewill push the content to the next page;break-before: rightorbreak-before: leftwill push on a right or a left page;break-before: rectoorbreak-before: versowill let you do the same for a book that will be printed recto/verso, without spread
See the Pen PagedMedia — @page namedPages layout First and blank by julientaq on CodePen.0
Generated table of contents
Paged.js includes a solution to access the page number of any element you would want to make a reference to. For example, you may want to ask your reader to look at the chapter About Orsumness of your book.
In HTML, we use links when we want to make a reference about something, such as a website, or even a paragraph or an image.
To be able to automatically get the page of an element, you need to provide its anchor, that is set, in HTML, using the id attribute. So let’s make the awesome chapter:
<section class="chapter">
<h1 id="AwesomeHeader">About Orsumness<h1>
<p>The first paragraph of the chapter</p>
<!-- the rest of the chapter -->
The <h1 id="AwesomeHeader">AboutOrsumness<h1> gives the id of “AwesomeHeader” to our chapter title. So we can target it using #AwesomeHeader in any link.
For example, you could have a paragraph with a link like this:
<p>you'll see that in the <a href="#AwesomeHeader">About Orsumness — see page </a>.</p>
Now, if you click on the About Orsumness link, you’ll be automatically sent to the page where the chapter title is linked. When we’re printing, we want to show the page number on paper, so any reader can find his way in the book. The only CSS needed for that would be the following:
a::after {
    content: target-counter(attr(href), page);
}
The target-counter property will look for the attribute href and for the location of the content in the book. The result would be
you’ll see that in the About Orsumness — see page X.
This is also a useful trick to build a table of contents:
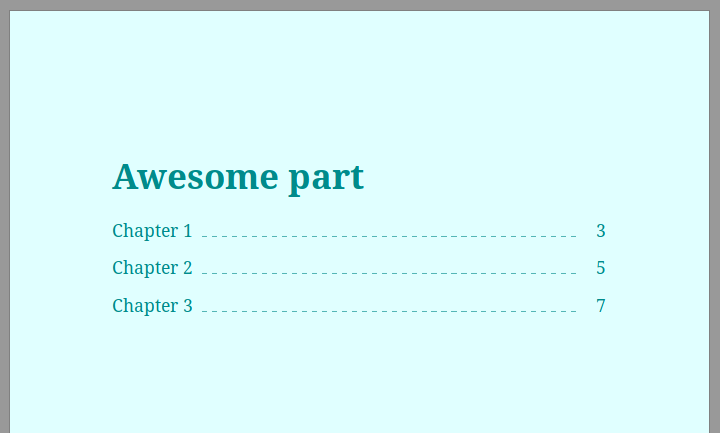
See the Pen PagedMedia— Table of content simple exemple by julientaq on CodePen.0
Maybe it’s a little bit more
than a quick look.
This is the end of the first tour of Paged.js, and it’s already full of usable features and easy solutions. It’s a first (not so) quick look at what we’re actually working on. In the incoming weeks, we’ll add more materials, and spend more time on examples and more complex tutorials.
Looks promising! I couldn’t find any information on how paged.js compares to Vivliostyle. Are the goals of the two projects different? Why couldn’t you build on Vivliostyle? Thanks for the clarification!
Paged.js is setup as modular polyfills, with the goal of being able to quickly discarding parts of our Javascript rendering as soon as equivalent CSS implementations become possible.
With the parts we had to implement in Javascript, we have tried to keep as close to native rendering as possible. For instance, we use css columns for our page fragmentation and css grids for the page margin positioning.
Thanks, I finally got around to giving paged.js a try. Looks promising! Is there a way to trigger a re-render? Say, I call `paged.preview(DOMContent…`, then change the DOMContent. If I simply call paged.preview again, I get:
`Cannot read property ‘querySelector’ of undefined` in `chunker/page.js` in `var area = page.querySelector(“.pagedjs_page_content”);`
Thanks!
Glad to hear that Mauro!
So, we have some hooks that let you pass some js in a few different entry points. But it really depends on what you want to achieve. A proper documentations for the hooks and some examples are coming (including maths, side notes, etc.). Meantime, you can jump in the pagedmedia to talk with us about your specific needs.
Is `titleRun` in the post a typo? Should it be `runningTitle` instead?
I’m very excited about paged.js! Thanks for the awesome work!
Hey Yihui! Thanks for the kind words. 😀
And for having spotted that one! I fixed the article on that front.
Thanks again!
Hi, I wonder if it is possible to reset the page counter after a certain element? I tried `counter-reset: page;` but it didn’t seem to work. My use case is to use roman numerals for the frontmatter of the book (`content: counter(page, lower-roman);`), but change to decimal when the first chapter starts.
Hi, I have a long table (spans over 4 pages in chrome and safari) but it doesn’t break into multiple pages in Firefox when using paged.polyfill.js. I get the table on first page only with some overflow content in Firefox. Any possible reason that I’m missing or anything that can help me to fix it in firefox? Thanks in Advance!!
Hi Fred!
Somehow your comment only appeared in my list today.
Firefox is not a browser paged.js supports today, because it lacks the @page {size} property. So we’re focusing on chromium (which is really something we dislike for a lot of reasons).
Also, seems like you have a complex issue on hand, so we’ll be happy to help.
Thanks!